
How To Make Stickers On Cricut? [A Brief Guide]
If you want to make something customized with a Cricut machine, stickers are the best way to go. You need an inkjet printer and a Cricut cutting machine to create professional stickers in the comfort of your home.
The stickers are best for decorating or personalizing your bullet journal. Especially when they are handmade stickers, it looks best on gifts and small items for selling. Plus, they go well with your business products to increase your brand recognition. This is why we made this tutorial on how to make stickers on Cricut, through which you can create beautiful stickers for any purpose.
Generally, adhesive papers are used for making Cricut stickers. Then it is printed and can be cut in any size; with the Cricut machine, it's easier to make different-sized stickers that will look no less than a professional stickers. You can also use vinyl, PVC, and foil for this purpose. To make stickers, we will use the Cricut Print Then Cut function, which needs an inkjet printer. However, you can draw your design with the best Cricut pens. You need to set the images that you want to draw in the Design Space.
Create The Image File
In the Design Space, download a pre-made sticker sheet image file, or you can design your own sheet image in some apps such as illustrator, procreate, etc.
Upload The Image To Design Space
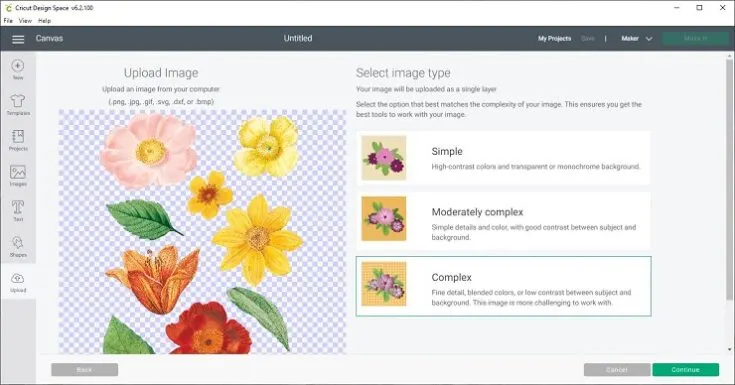
First of all, open your Cricut Design Space. Then, create a new project and click the Upload button on the main screen. After that, locate your image file and click Upload Image to import the sticker design.
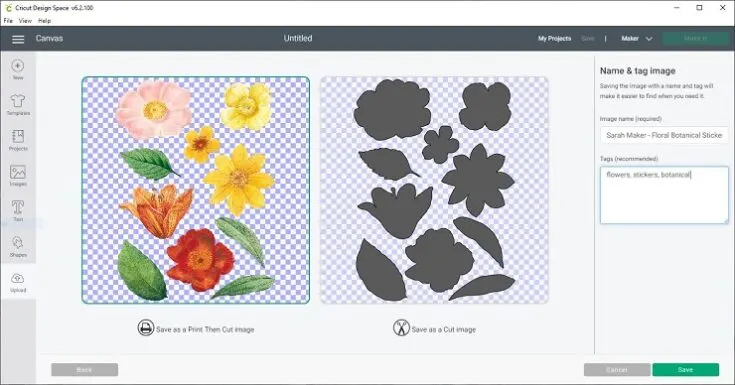
The Cricut Design Space will ask you to select the image type. Once you select it, click Save as a Print, then Cut image option on the next screen. If you want, you can name the image. Lastly, press Save. After that, click Insert Image to upload the image to your canvas.
Print The Image
When the image is finally on the main canvas, you need to resize it to make it suitable to Print and then cut. If you notice the image is too big, resize it so that it can fit in the 6.75" X 9.25" printable area. Then, put the sticker paper into your inkjet printer facing up.
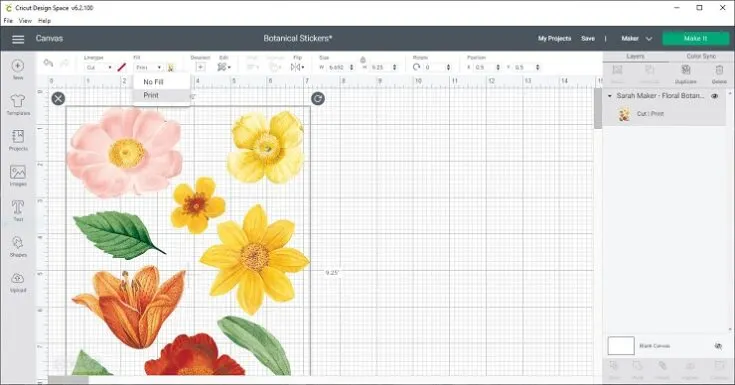
Now, click the Make It button on your Design Space. After that, click Continue and then Send to Printer. Then, select Print to print the sticker design. There is an option as 'Use System Dialog' to utilize more advanced printer settings for getting the highest print quality on stickers.
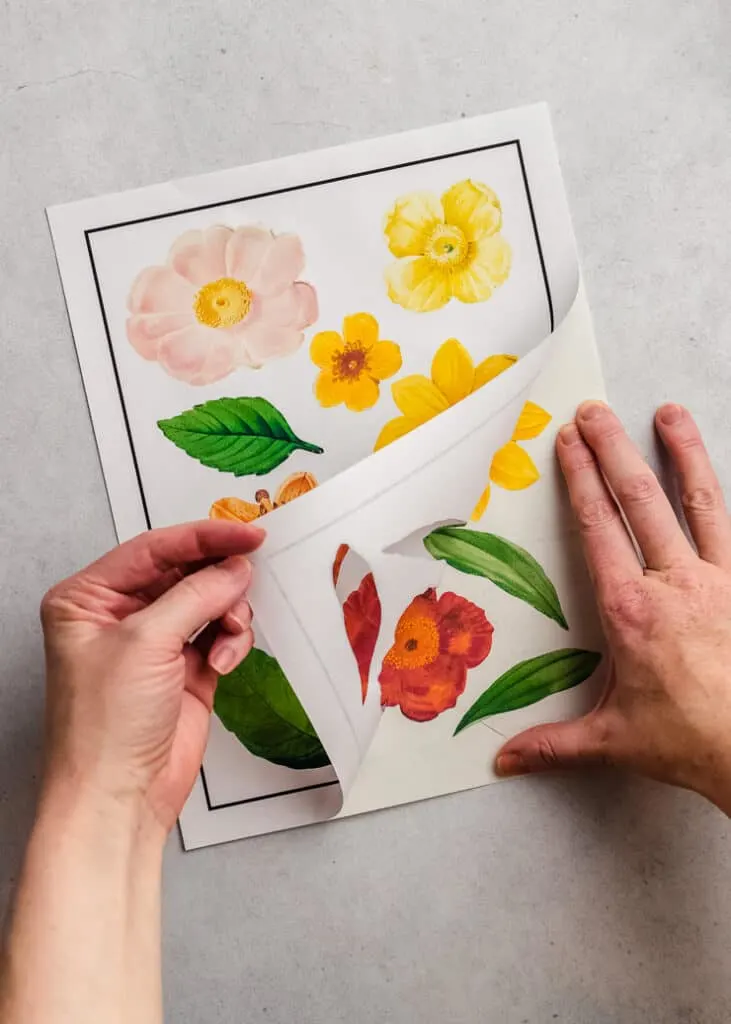
The printed sheet will have a solid black rectangle around the boundary of the design. Those lines are useful, as the Cricut machine will use them to cut the design accurately.
Set Up Your Materials

Move to Cricut Design Space and select the material. As you know, our material is "sticker paper" as we are making a sticker out of it. The material settings will change according to the type of cut you are expecting. Hence, you need to be aware of the settings and the results you want.
Load The Mat

Put the printed sticker paper on the LightGrip blue mat. Adjust the page close to the upper left corner, so it lines up properly with the mat. Then, make the sticker paper surface smooth with your hands or a brayer tool. After that, load the Cricut mat into your Cricut machine by pressing the flashing arrow button.
Cut Out The Stickers
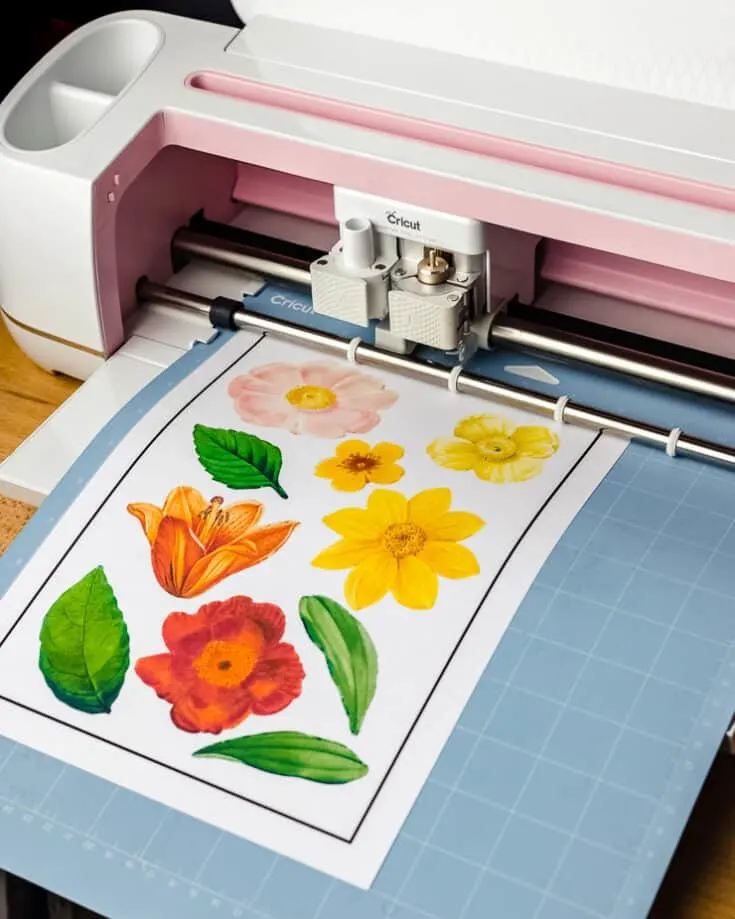
Once you load the mat into the Cricut machine, check the Cricut icon button as 'start to flash.' It indicates that your machine is all set to cut out the stickers. Now, press the C button to start cutting.
After that, you will observe that the Cricut has started moving around your sticker paper to scan the black lines on the edges. When the scanning is done, the machine will start to cut.
Unload The Mat And Remove The Stickers
When the cut is done, the Cricut machine will ask you to unload the mat. Then, press the flashing arrow button to unload the mat. Before unloading the Cricut mat from the machine, you should check that the cut has gone right, especially in the case of 'die cut' stickers. If it's not up to the mark, you can run a second cut.
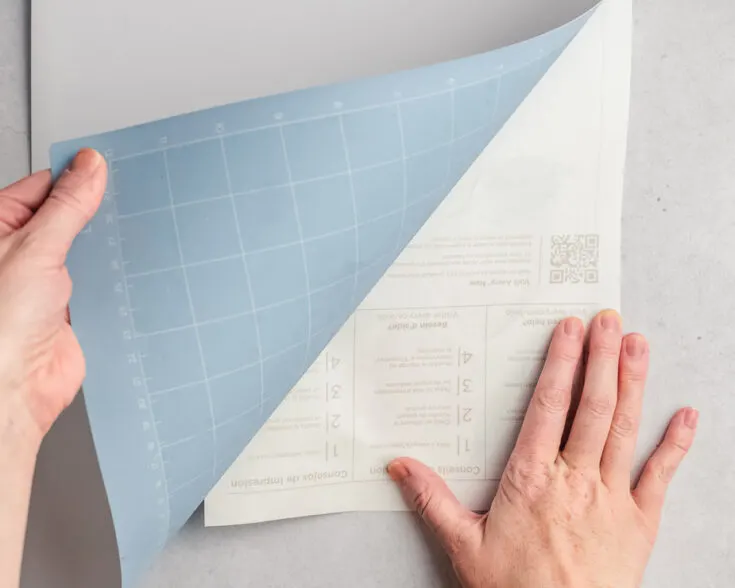
When the cutting is done, unload the mat from the cutting machine and remove the stickers from the mat. Your stickers are ready now. If your sticker sheet is ripping or curling as you peel it off, we have a solution for you. Place the mat upside down on a clean surface and peel off the mat from the sticker sheet. This method will prevent the stickers from curling up.
Finally, you have your stickers ready. I hope you understand how to make stickers on Cricut. This guide will help you in making stickers with your Cricut machine. All the steps are easy to follow and to create professional-looking stickers.

Comments
Post a Comment